Saturday, September 22, 2007

Porch

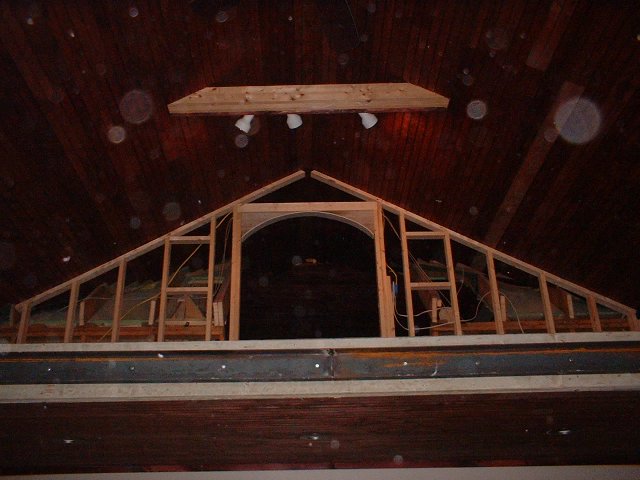
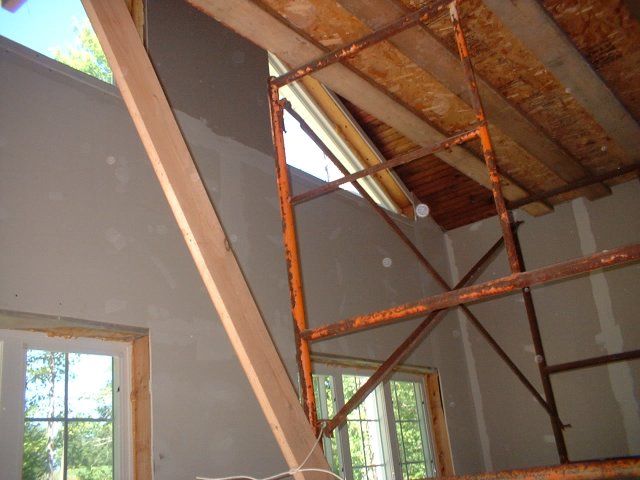
At the start of spring this year of 2007, our first project was our porch, because that is one of the projects we could do ONLY during these days, and because we wanted to be able to enjoy the breeze on a summer day here, just outside our house.


I asked hubby if he would want to put the captions in, to which he answered, "yes, but not tonight."
So bear with the above...those are my captions.

Friday, November 10, 2006

Kitchen - What we have accomplished during summer 2006

I took short video clips of our kitchen from different angles after working on it the whole summer of 2006. These are short mainly because my digicam's memory card was a small one. (The next videos will have longer ones, promise!). I shot these clips mainly because I was updating an aunt in Texas about our progress. She and her family visited us during early summer.

Notice that here we have returned our kitchen appliances where they should be, although the layout is different from how it was prior to working on our kitchen, mainly because of the creation of an island.


Monday, October 30, 2006

The Master Bedroom used as Temporary Kitchen


As we got ready in June 2006 for working on the kitchen, we used the master bedroom as the temporary kitchen. We placed the fridge there, used the dresser as countertop, and Gary installed the temporary countertop (which we previously had in our kitchen) with sink on one wall near the bathroom. All other building materials are also stored here -- pile of hardwood flooring, tool boxes, etc. We had this setup for two weeks (Gary could not bear to have the busiest area in our place of rest anymore, so we transferred them back to the kitchen area as soon as we could, though it was still far from finished.)

A Better View of our Living Room as of June 2006


After we were done with our living room, we now (June 2006) used it as storage area for some kitchen appliances and pantry items while we worked on our kitchen. The rest of the kitchen items were temporarily placed in the master bedroom. Here I also showed the balcony (my office) from below. This is a short clip of how the living room looks at this time. Pardon the children's noise (they seem to make more noise when they know I am taking a video.) and the mess. Hey, what can you expect of an unfinished house with no cupboards and cabinets yet???

Thursday, October 19, 2006

Living Room video as of June 2006


This is a video starting from the entryway into the balcony where my office is located, and opposite that is the future library. The stairs leading to the balcony originates from the kitchen and leads to a landing surrounded by the kids' bedrooms. There is a short hallway from the stairs to the balcony, where my office is located at one side and the future study area (no books/shelves there yet) on the opposite side. When entering the balcony, the triangular windows of the living room are readily seen. The balcony is situated above the living room covering about half of it. Towards the end of the short video, I am showing a view of the living room. Pardon the mess and the seemingly barren LR (we are at this point bereft of shelves, curtain, and all those finishing touches).

Working on our Kitchen Project

We have demolished our temporary shelves and countertops in our kitchen and here is how it looks like after the initial step of installing the insulation and plastic sheet, plus some pipes for the water source. As usual, my son wanted to be in the video, so please be patient with him. Later on I will post slides of photos that show the gradual (read: SLOW) changes that we make as we work on our kitchen. We stopped at the tile floors, and we will have to work on the cupboards, cabinets, and ceiling later when we have enough money to finish those.

Friday, September 08, 2006

How we made our arches

We receive many "ahs" and "ohs" from friends and relatives who see our simply elegant arches, so we are sharing here how we made them, in case you also want to add arches to your homes (instead of plain squares dividing one room from the connecting room).

Just watch this slide and learn:


Disclaimer: We are not professionals. My husband learned how to make this by watching the person he hired when they were building his first house (which got burned in Sep 2002).

Monday, June 12, 2006

Living Room Post # 7


This is now the finished window and walls. The trim is not fancy, as Gary does not have enough skills to come up with a fancy one, (although, IMO, skillful enough to make such a simple yet smooth trim).


Here Gary starts laying down the hardwood floor. The blue sheet is a thin foam lining to make it soft enough for people to walk on and to add protective feature for fragile items that might accidentally land on it.


Then he starts to work on the balcony which is where my office would be.

He placed tracking lights there, and an arched entryway from the kids' bedrooms area where the stairs are.

Posted by Picasa

Living Room Post #6


Gary is now applying the primer to the walls using a motorized painter which he bough on sale at WalMart.


Patrick helped on the lower areas. He realized it was not easy even with the motorized gadget! At least he did not have to carry the container using his shoulder. Posted by Picasa

Living Room Post #5


Before we proceeded to painting the walls, Gary did the ceiling here first. Above this is the balcony where I would have my home office. The wall on the right divides the living room and our master bedroom. That wall will be used for what we plan to be our "screen" for DLP projection TV in the future (we hope!).


Here, Gary is installing the recessed lightings on that ceiling. We placed three of them. Posted by Picasa

Living Room Post #4

Mudding came next. Muds are placed over seams and holes created by the screws. It should be as thin as possible so as not to have problems with drying (may tend to crack if too thick, plus it gets harder to dry).
Here Gary is using the power sander, and I do it manually using a sponge sander for the finished touch. Posted by Picasa

Living Room Post #3

Gary is putting up the sheetrock against the wall here.


The sheetrock has finally reached the ceiling!

Now we are ready for mudding and sanding. Posted by Picasa

Living Room Post #2

Gary has installed the ceiling fan here, but we are yet to work on the walls. In this photo, the ceiling is pretty much all done. That staging which we use to reach high places would soon be removed out of the LR once we have worked on the highest hard-to-reach areas.


Gary finds his table saw and a lot more other power tools very handy!

You can see on the background the windows, with walls still bereft of sheetrock.

Tuesday, July 12, 2005

Living Room Post #1


Here is the left side of the living room ceiling as viewed from the landing. Ahead is the right triangle of the upper window.

AS you can see, before the pine boards were placed (interlocking like puzzle pieces), there is a layer of green insulation board overlying the plastic sheeting overyling the fiberglass insulation.


Here, Gary had finished putting all the pine boards one by one on both sides, but he still had to tackle with the middle part which is exposed.


He made pieces of wood from 2x2 boards, shaped them accordingly, and stained them the same color (it was not easy for a non-pro calculating the angle and actually cutting the pieces to fit!). The next thing he did was to line the electrical wiring through these A-shaped boards (support) and box them in.


Here he had covered the gaps, boxed that thing, and made a line for the ceiling fan.

It is very warm to the eyes...very homey...

I could already imagine lots of things to do in decorating...

The next thing we did was to get a ceiling fan from Home Depot. Not much choices but I did not want to get online. It is better to see it in actual prior to purchasing.


This is the box of the ceiling fan that I chose. Big enough for the size of the living room (60 inches diameter), and simply elegant. (No fancy lights that look like baso for me, please!)


These were the parts ready to be assembled. Of course, that part had to be done by Gary!